Ask an AI to "make the cup blue and keep everything else the same", and the cup turns blue. But look closely and the wood grain on the table is a little different. The shadows moved. The pattern on the curtain has been drawn again, almost the same, but not quite.
For most things nobody cares. For a spot-the-difference puzzle it's a disaster, and it's the problem we've spent more time on than anything else in the editor.
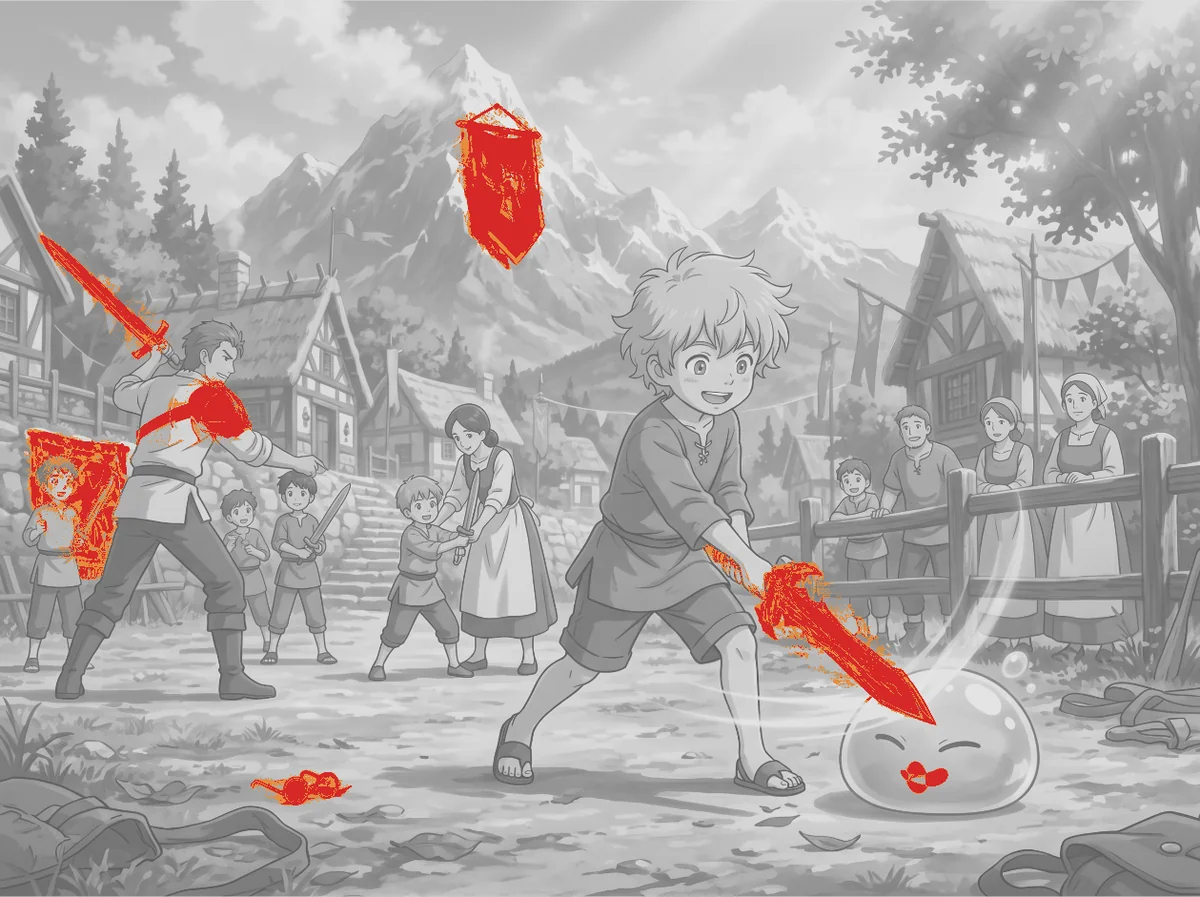
The picture at the top shows what a finished level looks like when you compare its two images pixel by pixel. It's from our Anime Adventure pack. Everything red is a pixel that differs between the two versions. That's all there is. No noise in the grass, no outlines that shifted by a pixel. Getting a level to look like that takes some work, and that's what this post is about.
Why the AI changes everything
Most image models don't edit a picture the way a photo editor does. They generate a new picture, based on the old one and your instruction. Even if the model understands perfectly well that only the cup should change, it still draws the whole scene again.
And redrawing means small changes everywhere. Wood, fabric, grass, and hair keep their character, but not every fiber ends up in the same place. Edges and shadows move by a pixel or two. The brightness drifts a little across the whole image. Small text and patterns, like book spines, labels, or tiles, love to change their details.
The newer models are a lot better at this than the ones from a year ago. None of them are perfect, though, and for this job "almost" isn't enough.
Why it ruins the puzzle
Players look for any change between the two pictures. They don't know which ones you meant.
So when the AI accidentally changed the pattern on a pillow, the player sees it, taps it, and gets told they're wrong. That's a really specific kind of frustrating, because the player was right. Something did change. A couple of those and the level feels broken, and people stop trusting it.
A fair puzzle needs one strict rule: the two images have to be identical everywhere except at the marked differences.
Finding every change
First you need to know what actually changed. As soon as both images are in the editor, it compares them pixel by pixel and works out how different the colors are at each point. Above a certain threshold, a pixel counts as changed.
A plain comparison like that would mark thousands of little spots, so the detection is a bit more forgiving. Each pixel is compared not only with the pixel in the same spot, but also with its neighbors, so an edge that moved a pixel or two doesn't count. Changes that are close together, like the parts of one redrawn object, get merged into one area. Tiny areas are thrown away, because a handful of changed pixels is almost always noise. And each area gets a little padding, so the marker covers the whole object and a tap on the edge still counts.
What you end up with is a set of markers that mostly matches the changes you wanted, plus a few extra where the AI did its own thing.
Deciding what stays
Now it's up to you. For every marker there's one question: do I want this difference in the puzzle? If yes, keep it and fix the shape if needed. If not, delete the marker and restore that area, either by copying it over from the source image or by editing it again.
The threshold setting helps here. Turn it up and weak changes are ignored, which is useful if the AI shifted the colors slightly across the whole image. Turn it down and it catches even subtle changes, which is useful when you want to make sure an image is really clean.
Copying everything else back
The tool that does the most work comes last. Once all the real differences are marked, click Apply everything outside the differences. It takes every pixel outside your markers from the source image and copies it into the comparison image. Inside the markers, nothing changes.
After that it doesn't matter anymore how well the AI kept the scene intact. Outside the markers, both images are identical down to the pixel, because they literally are the same pixels. The only differences left are the ones you chose.
This works best if the markers have a bit of room around the changed objects. Otherwise the copied background can meet the edited object with a visible edge. The automatic padding usually takes care of that.
Making less mess in the first place
It helps to cause fewer side effects to begin with. Instead of editing the whole image, you can select one area and describe the change just for that. With the mask option, the AI can't touch anything outside it. If one spot goes wrong, you can restore just that area without undoing everything else.
Also check that both images have exactly the same dimensions. The editor warns you if they don't, because otherwise every pixel gets compared with the wrong one and the result is nonsense.
How we do it
For our own AI levels it usually goes like this. We generate a clean source image, then the comparison image with a specific list of changes. We let the editor find everything that changed, delete the markers we don't want, and run "apply everything outside the differences". Then one of us plays the level and looks for anything odd.
That's a few minutes more than just generating two pictures. In return, every time a player taps something that looks different, it actually is a difference. That's pretty much the whole difference between a level that feels fair and one that doesn't.
If you're new to the editor, the step-by-step guide covers the rest.